The kaleidoscope was invented by David Brewster in 1817. .... The experiments
with hinged mirrors are directly related to the kaleidoscopes we are planning to.
Reflections, Kaleidoscopes, in an Elementary School Setting by Craig Willis Introduction There are many mathematical concepts which young gifted students find interesting. When one mentions math and education, one tends to think of arithmetic. Arithmetic is not covered in this Unit of study. Symmetry, reflections, perspective, and infinity will be studied mathematically and through the point of view of kaleidoscopes. Symmetry, reflections, perspective, and infinity are broad and deep concepts on their own. Each of these topics could be studied extensively. For elementary students, the basic foundation of each of perspective and infinity can be understood. Symmetry and reflections are part of the NCSCS. We will use mirrors in our lessons to illustrate these concepts. A second part of this unit will be the description of the construction of kaleidoscopes to illustrate these math concepts. Store bought kaleidoscopes will not be part of this project. Kaleidoscope construction will include methods for building real models. Since glass may be part of these devices, safety must be addressed as well. All these kaleidoscopes will have illustrations of the math concepts described earlier. These illustrations will also need to be developed and their construction described in detail. Students may make some simple kaleidoscopes, but most of the manufacturing of the kaleidoscopes will be done by the author. Examples of different designs will be explained and built. This unit will include step by step instructions for the construction of these kaleidoscopes. For classroom presentation purposes, methods for building virtual kaleidoscopes will be presented. We will investigate what kind of kaleidoscopes are out there in the virtual world. It seems like this has already been done. Last Spring, while I was reading about wallpaper design, a first grade child came up to me with a Nintendo DSI. It had a camera in it and it manipulated the pictures in various ways. One of the ways was called mirror. This mode was really a virtual kaleidoscope. A History of Kaleidoscopes The kaleidoscope was invented by David Brewster in 1817. It quickly became popular as a toy. Elaborate designs were built for home entertainment. Kaleidoscopes continued to be popular until the advent of the TV. It still had appeal as a child’s toy, but went out of fashion for adults. Today, the word kaleidoscope has multiple meanings. Charlotte Mecklenburg Schools has a elementary reading book called Kaleidoscope which has nothing to do with a real kaleidoscope, but it does show how the word is used in many different settings.
Childhood Memories When I was a child I had three encounters with mirrors and kaleidoscope-like activities. Like many children in the 1960’s I had a kaleidoscope that was made out of cardboard. It was fun to play with, but I never really understood how it worked. At the barber shop there were mirrors on all the walls. You could see yourself for what looked like forever. The first activity I did with mirrors, included facing two mirrors towards each other and producing an illustration of infinity. In the town I lived, there was a shiny black glass column. Another child and I would stand on opposite ends of this rectangular column and split ourselves in half and look at each other. The reflection of our bodies would complete us so we looked like a whole body. When we lifted our leg in the air, it looked like we were floating in thin air. These memories have stayed with me for many years. It seems a unit of reflection would interest young children too. Today’s Gifted Elementary Students The students I work with are in the third, fourth, and fifth grades. They are all above grade level and have little trouble surpassing the State required curriculum. They are tested on symmetry, and reflection, but at a very simple level. It is my intent to follow this “grade level” into a deeper understanding of these concepts. Activities and materials will be developed in the hope of building their motivation so they may want to study this area of math on their own. This is still elementary level students. To help the students develop a deep understanding of symmetry and reflection, as many activities as possible need to be concrete or involve real objects. NCSCS Objectives The North Carolina Standard Course of Study directly addresses the topics of this Unit. Competency Goal 3: The learner will understand and use properties and relationships of plane figures. The objective 3.03 states: classify plane figures according to types of symmetry (line, rotational). Another description of objective 3.03 Identify, predicts and describes the results of transformations of plane figures: a) Reflections. b) Translations. c) Rotations. Students are expected to tell the difference between a glide, a slide or translation, a reflection and a rotation. They are not expected to know when these concepts are used together. There are questions in the End of Grade test which address this objective. Yet, Charlotte Mecklenburg Schools does not have any activities for this objective. The CMS Elementary Math Pacing Guide 2010-2011 has no listed activities for this objective. The purpose of this Unit is to supply an outline for activities that will support elementary teachers and students in the study of 2 dimensional plane figures and their transformations. Students will be expected to keep up with activities in a notebook. They will record the activities and measurements of angles and take notes on experiments. Each activity will have specific objectives that the students will be aware of before the lesson is presented. Since this is an elementary school setting, all lessons will have some component which is either hands on or in the real word.
Understanding Reflection Symmetry Start with some simple activities using only one mirror and objects to be seen and reflected. Using real objects and splitting them down the middle, see if the students can see which objects have reflective symmetry. Bugs and pictures of bugs are good for this first activity. Regular polygons are also useful. Yes, a circle is not a polygon, but it is still interesting to study. A circle has infinite number of reflective symmetries if the mirror goes through the center. A square or a regular triangle has a finite number of reflective symmetries. The mirror needs to go through the center to achieve this symmetry. These same shapes, including the bugs, will be viewed again when we are using hinged mirrors. This and the use of the notebooks will lead to continuity throughout the Unit.
Using the single mirror, have the students study other simple objects. A mirror and a ruler can form a simple experiment. It is also interesting to use the mirror and study just a simple line and its image. What is the difference between the line and its image when the angle of the line and the mirror changes? Sounds simple, yet the results are complicated. Filling Up a Space Through Reflection To understand how a kaleidoscope works, students need to know how mirrors can be used to allow us to see a part of a picture and fill in the entire picture using a series of reflections across the vertical symmetry line and the diagonal symmetry line. This can be illustrated using a square, a vertical mirror line, a diagonal mirror line and a mirror. Start with an oval in the top middle left side of the rectangle. By placing a mirror on the diagonal line the oval can be seen in the left near the top side. This is the reflection across the diagonal of the d(oval).
By placing the mirror along the vertical line, we get the reflection of the first oval along the vertical line and the copy of the reflected oval, d(oval). Now we have v(oval) and v(d(oval)).
Then by placing the mirror again along the diagonal line, the reflections fill in the left side of the rectangle. This reflection would include d(v(oval)) for the reflection on the left middle and the d(v(d(oval))) at the bottom left. Once again we switch to the vertical line of reflection to complete the filled area. Here we have v(d(v(oval))) on the right edge and at the bottom we have v(d(v(d(oval)))) or d(v(d(v(oval)))) if we had started our reflections with a vertical reflection instead of a diagonal reflection.
These illustrations demonstrate how a complete figure can be filled using an image on a regular polygon and reflections. In the classroom, this lesson would be difficult to do with a large group, but manageable in a small group at a table with the use of mirrors. The teacher must be careful to use plastic mirrors for safety reasons. This could also be done using paint and folding each section and blotting paint on the other side of the paper during the fold.
By placing your eye at the end opposite of the figure, you can imagine light rays coming from the figure. One ray from the object will come directly into the eye. Other rays may reflect off the mirrors and reach the eye at a different angle. When a ray hits one mirror and then another mirror it reflects off the other mirror it too will be coming from another angle when it reaches the eye. As the angles are different they produce multiple images. 1
Angles of the Mirrors Inside a kaleidoscope the angle of the mirrors changes the number of reflections. Different kaleidoscopes have different designs which reflect the images presented. For example 72 degree angle produces a 5 point star or a regular pentagon. The simple way to point this out is dividing 72 into 360 and we get 5. Since the angle of the two mirrors inside a kaleidoscope makes a large difference in the number of images, it makes sense to have multiple kaleidoscopes to illustrate these differences. The angles of the two mirrors to be made in this project will include 20, 40, 60, 72 and 90 degrees. Each of these angles will reflect different number of images. There will also be kaleidoscopes which will use three mirrors, and the angles will be either 60 or 90 degrees. If the degrees of the angle of the mirrors do not divide into 360 evenly, the last image only develops part of the image. This is easily illustrated using hinged mirrors.
Two hinged mirrors
and a protractor
Object to be viewed Classroom Activity Using Hinged Mirrors Hinged mirrors will illustrate what goes on inside the kaleidoscope. Plastic mirrors will be needed for safety reasons and every student will need a pair of mirrors. Protractors or polar paper will also be needed to demonstrate the changes the angles will make to the number of images. Using the left over plastic mirror material, attach two mirrors with tape and set them on the protractor or polar paper. Place an interesting object between the two mirrors and view how the number of images changes when the angle changes. Have the students record their findings. What happens when the mirrors are 60 degrees apart? How are the images different when the mirrors are at 30 degree angles? Glass Mirrors a Safe Way One way to use real glass mirrors and do it safely would be to mount the mirrors to wood. During the making of real kaleidoscopes, a table was made using plywood. This plywood can now be of use as a backing for glass mirrors. Lowe’s Hardware had glass tile mirrors for sale in packs of 8 one foot square. The plywood can be mounted on the plywood after the wood is cut to the desired size. The size could vary from small one by one foot areas to larger standing mirrors.
Hinges can be attached to the wood and the mirrors can be attached using contact cement. These hinged mirrors will look great and should be safe but they do have a major draw back in that they will be heavy. Carrying 15 of these hinged mirrors to and from classroom may be a physical problem. Once they are in the room, fine, but all these lessons are intended to be lessons which travel throughout the school setting. Transportation could be a problem. Don’t build these unless you have a way to move them. Students will need to do more than just observe. They need to use the mirrors themselves. They need to take notes and describe what is happening. Measurements need to be made of the interior angles of the hinged mirrors. Images need to be counted. Why do we get more images as the angles get smaller? What happens when two pairs of hinged mirrors are facing each other? The experiments with hinged mirrors are directly related to the kaleidoscopes we are planning to build. Building Kaleidoscopes There are lots of different ways to build kaleidoscopes. This project will describe at least one method and variations off this method. Materials as well as descriptions of manufacturing will be included. Hopefully the end result will be not only directions for building kaleidoscopes, but many unique kaleidoscopes. Materials Two inch inside diameter ABS black pipe, item number 44011, can be ordered from Ace Hardware. This pipe comes in ten foot lengths. For this project eight of them should be enough. They cost about $8.00 each. The wall thickness is 1/8 of an inch leaving the overall diameter at 2 and ¼ of an inch. This may be relevant in finding the cases for the objects. This pipe has some writing on and is not as attractive as it could be. Wet sanding with 1000 grid sandpaper removes the writing, but it leaves the pipe dull. A cotton rag with acetone on can be used to bring back the shine of the pipe. The pipe will be cut using a ten inch miter box or any other power saw. (careful) Reflective material (StyreneMirror) was to be purchased October 24. Unfortunately the company, American Acrylics, who sells the material, does not take credit cards. So, a check was sent to them at a cost of $85 for the material and with a total of $109 for shipping and handling. They shipped the material, which 48 by 96 inches and .04 inches thick. American Acrylics, Inc.’s address it 8124 Central Park Ave, Skokie IL 60076 and the phone number is 847 674 7800. Length and Width of the Mirrors for the Kaleidoscopes Since the inside diameter for the kaleidoscopes is 2 inches, the lengths of the mirrors can be ascertained by the desired angle. This will also determine the angle of the mirrors once they are in place. All of these kaleidoscopes will be between 14 and 15 inches long. The 20 degree angle will need to be 1 & 15/16 inches wide. The 40 degree angle will be 1 & 7/8 inches long. The 60
degree will be 1 & ¾ inches long and the 72 degree will be 1 and 5/8 inches long. The 90 degree kaleidoscopes will have four mirrors in them with a width of 1 & 3/8 inches long. The 90 degree kaleidoscopes will illustrate infinity. Some of the 60 degree kaleidoscopes will have two mirrors and some will have three. The mirror material will be a plastic sheet that is 4 by 8 feet or 48 inches by 96 inches. The material is 1 mm thick and is called Styrene Mirror. If cut very carefully, little of this material should be wasted. The six styles of mirrors add up to a total width of 26 ¾ inches. Ten sets of the six styles of kaleidoscopes could possibly be made from one sheet of reflective material. This is expensive, so cut it carefully using a wallpaper knife. Styles of Displays Styles to be considered include the classic container with loose material inside. It would be nice to find a colored tube with colored liquid inside. All will need a frosted backdrop to keep the background from view. Finding the Correct Container will be a Challenge It hoped containers can be constructed out of straight pipe fitting. These fittings can be ordered from Ace Hardware, item number 44026. A two and a quarter inch circle of glass can be put between the end of the pipe and the pipe fitting and glued in place. On the end of the pipe fittings a circle of frosted plastic can be glued in place after the objects are placed inside the container. If done correctly, between 48 and 64 kaleidoscopes can be made and will be used in classroom demonstrations. If possible, other examples of kaleidoscopes will be developed. It would be nice to have a large walk in kaleidoscope or a virtual one to be used with pictures. Rational for the Description of the Making of the Kaleidoscopes While working with large groups of students, it is important that lessons be not only educationally sound, but entertaining. The beauty that a kaleidoscope displays assures there will be a strong motivational element in any lessons on reflection. To be able to use kaleidoscopes in the classroom settings many kaleidoscopes must be built. The kaleidoscopes need to be sturdy because hundreds of students will be handling the kaleidoscopes and they need the ability to be taken apart so the students can see inside them and see how they are made. The kaleidoscopes need to have multiple mirror designs to illustrate how different angles display different symmetries. The process for making the kaleidoscopes has been filled with opportunities for learning due to multiple problems. It is the purpose of this unit to describe the steps needed to produce the kaleidoscopes suitable for a classroom setting. These kaleidoscopes are designed to be sturdy and
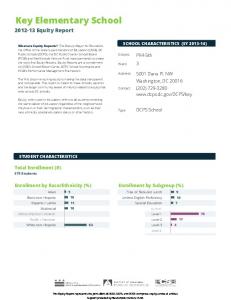
should last for many years. Readers should be able to follow detailed plans and avoid problems and extra expense. By including some of the mistakes, it is hoped the readers will avoid them. Failure is not always the best way to learn. Basic Parts of a Kaleidoscope Kaleidoscopes have some basic parts. The barrel of a kaleidoscope holds the mirrors. In this case the mirrors are made of a reflective material called Styrene Mirror. At one of the barrel there is an eye piece to look through. At the other end is a viewing container or vivenda case which has the materials which are to be viewed. At the far end of the viewing container is a piece of frosted material. This frosted material is to keep the background out of view. Without the viewing container and the frosted piece the kaleidoscope would be a teleidoscope or “distant form viewers.” 2
Figure 1: Finished Kaleidoscope A teleidoscope is interesting too and all the kaleidoscopes described can be teleidoscopes removing the vivenda case. There are six different mirror designs built for this Unit. Each one of these six designs can accommodate any of the 64 unique vinenda cases. These interchanging
vivenda cases will give a great deal of variety to this Unit. This will allow the students to see the mirrors inside the kaleidoscopes and allow the vivenda cases to be used with all the kaleidoscopes. Barrels The barrels should be black on the inside. Since many kaleidoscopes are to be built, the barrel material needs to be inexpensive. After an extensive search on the internet, black ABS piping was found at Ace Hardware. Eight, ten foot pieces of two inch piping were purchased. The ten foot pieces were cut into pieces around 14 and a quarter of an inch in length. This produced 64 fourteen and a quarter inch barrels with 8 five inch barrels as leftover material. These barrels were sanded to remove the writing on when they were still ten feet long. This left the barrels dull and spotty. The barrels were treated with acetone to make them shinny. The treating of the barrels with acetone done with an aluminum tray purchased at a grocery store. A thin layer of acetone was poured in the tray and each piece was rolled in the acetone and set aside to dry. After treating about 12 barrels, the acetone can be thrown out and replaced with fresh acetone. This is a messy job, but you can clean up with acetone afterward. Viewing Containers or Vivenda Cases What could be used as a vivenda case? It would need to fit on or in the two inch pipe, and it would need to be able to hold the material to be viewed. Ideally it would be able to spin, but still be snug enough so it would not fall off the barrel. Wif3n5y rif3 pipe fittings were purchased at a cost of $.70 each. These fittings would fit the barrels because they were designed to, but they presented problems making them into vivenda cases. One side of the fittings fits nicely on the barrel, while the other side needs to be closed with a piece of glass in the middle and a piece of frosted material at the end so it can contain the viewing material. The piece of glass needed to be round and have a diameter of 2 and one quarter of an inch. These pieces of glass must be custom made, because they are not available to be purchased anywhere! A stained glass dealer in Davidson wanted three dollars for each glass circle. Luckily a glass dealer in Huntersville, NC called Glass and Mirror Unlimited was recommended by an employee of Ace Hardware. The owner of Glass and Mirror said he would do these for two or three dollars each. Ouch! A couple of days later he said he would do them for $.75 each so a hundred pieces of glass were ordered and delivered. The nice thing about using glass in this application, it in the middle of the container and can not be touched by the students. The glass and the silicone should also be water proof in case water, oil or other liquids are put into the containers to change the effect of the materials being observed.
Frosted Pieces The frosted pieces needed to be two and three quarters inches in diameter. These too would need to be custom made. A sheet of frosted ceiling lighting was purchased at Lowes Hardware. Round cutters were purchased there too. Unhappily the round cutters shattered the material. After some trial and error, it was discovered the material could be cut by a Dermal. This procedure took about three hours and produced 75 frosted circles. It is recommended whoever wants to use this Unit to build kaleidoscopes; they find a better method for acquiring the frosted pieces. Pieces to be Viewed There are lots of things that could be viewed. It just took a while to discover that just because something is pretty, does not mean it will work in the application. Objects need to be small enough to fit in the viewing containers need to be colorful in order to be interesting to view. There will be between sixty to seventy five vivenda cases. This could be quite a large amount of material. What Materials Should be Used? Once again lessons were learned through error! At a rock and mineral store, rock necklaces were purchased. Marbles, dice, reflective material and even cloth and different colored liquids were used. The bulk of the containers were to hold the rocks from the necklaces. Two of the first classroom activities were the mixing of the necklace rocks. This was a short activity in two third grade classrooms. The students were given a small plastic cup to put interesting rocks into. This produced forty five unique collections of rocks. This was a great starting activity for these students. They will be involved in multiple lessons using these kaleidoscopes before leave our school after the fifth grade. They will be able and look back and recall helping with the design of the kaleidoscopes. The trouble is the pretty rocks are not transparent. The light for the kaleidoscopes only comes from the back. Solid rocks will only show up as shadows. They need to be removed and replaced with other colorful translucent material. Lesson learned, stay away from pretty solid rocks. A trip to Wal-Mart, produced some cheap plastic glasses and some other plastic materials which can be broken into nice colored parts. Other materials such a stained glass were rejected due to safety reasons. Putting the Vivenda Cases Together Like the barrels, the fittings need to have the labels and writing remove. Then they need to be treated with acetone in the same way too. Next the glass lens needs to be installed using silicone. This is a messy step. Some of the extra silicone drips out onto the other side of the glass. This silicone has to be removed using razor blades. The glass must be cleaned on both sides. Then the visual material can be put in the container, and sealed with the frosted piece using silicone.
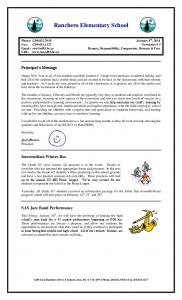
Mirrors are the Heart of a Kaleidoscope The mirrors and their placement are what gives a kaleidoscope its symmetrical images. All the other pieces are there to support or complement the mirrors. The cutting of the reflective material and the mirror placement are the most important steps. They are the most critical mathematical concept too. If the widths of the cuts are not correct, the mirrors’ angles will not be accurate and the symmetries will not be complete. As mentioned earlier, if the inside angles are not a factor of 360, then the images will be partial. The inside diameter of the barrels is 2 inches. By drawing 2 inch circles and measuring the angles and the length of the lines, it is possible to fine the width of the mirrors that correspond to the angles of 90, 72, 60, 40, and 20 degrees. These lengths were given earlier in this unit.
Figure 2. Cutting the Mirrors Cutting Mirrors Carefully Cutting the material to meet those widths will take some precision. A table to cut on was made out of plywood. A metal straight edge, clamps, and a wall paper knife was used to make these
cuts. Lay the material on the table and measure the material. Use the clamps to place the metal straight edge in place and cut the material with the knife. This first cut involves cutting the 4 foot by 8 foot sheet into 7 sheets that are 14 and a half inch wide and 48 inches long. In the photo below, a level was used as the straight edge. This was replaced by the L square which in the photo too. These 14 and a half strips of mirror were cut in the proper widths to make the different angles. A large paper cutter was used for this finial cut to produce the mirrors. Before cutting all the mirrors, it is important to test the angles and widths inside a barrel. This was significant, because the widths that were chosen to make the 90 degree four mirror kaleidoscopes was a sixteenth of an inch to short. If widths of the mirrors are cut incorrectly, then the mirror material would have been wasted and the project would end in failure. Measure twice and cut once! If cut correctly, the mirrors should fit inside the barrel at the proper angles. They still need to be stabilized. The three mirrored 60 degree kaleidoscope mirrors fit right into the barrel, but the other kaleidoscopes will need the support of a mold. Molds for the different angles need to be built. The molds do not have to be strong, but they do need to be accurate. They can be built out Styrofoam, reinforced paper, or cut out of wood. Silicone should be used to glue the pieces in place. A long thin wooden stick coated with silicone can be used to apply the glue evenly along the length of the back side of the mirror and the barrel so the silicone will not be seen in the reflections of the mirror. Not much silicone should be used. There were suggestions made that spray foam be used in the stabilization of the mirrors. The spray foam is usually used to fill in gaps in houses to keep air from going through holes and cracks. It can be purchased at most hardware stores. Once the silicone dries remove the mold. The last step is installing an eye piece. This needs to be 2 inches in diameter and have an eye hole in the middle of it. A thin piece of wood will do fine for this. A two inch dowel can be cut into thin layers using a miter saw. Bring one of the barrels when purchasing this dowel so as to make sure the dowel matches the inside diameter of the barrel. The eye hole needs to be centered with a centering devise which can be purchased at a woodworking store. A drill press would be helpful in drilling the holes. As a safety measure, a clear piece of plastic could be mounted inside this eye piece. Maybe a slide cover would do the job. These steps in building kaleidoscopes will produce many kaleidoscopes. They will need to be transported from classroom to classroom. It is recommended large duffle bags or carts be purchased to store the kaleidoscopes and for their transportation. Kaleidoscopes in the Classroom By design these kaleidoscopes are made for the students to study and take apart. The vivenda cases come off the barrel which allows the students to see inside. They will be able to compare and contrast the different angle kaleidoscopes. There will be enough of them built, so no one will need to share one and there will be plenty of extra kaleidoscopes for the students to choose from. The students not only can study the mirrors, but they can decide which of the vivenda cases they like most.
They may be fun and maybe beautiful, but there needs to be more if the students are to really learn about symmetry and reflection. The earlier experiments with the hinged mirrors are complimentary to the understanding of how reflection works. The reflection symmetry activity with the folding paper needs to be introduced before the students can understand how the kaleidoscopes work. Regular Plane Polygons Regular plane polygons are formed inside the kaleidoscopes by the reflections. Like the angles of the hinged mirrors, the angles of the mirrors are related to the number of reflections and the number of sides of the regular polygons. Since there are six styles of kaleidoscopes and five different angles settings, the regular polygons should be different too. The students can take off the vivenda case to see into the kaleidoscope and measure the angle of the mirrors. They should classify these kaleidoscopes and the images they make. What is the shape of the reflections when the mirrors are at 60 degree angles? How does this compare to the information the students gathered using the hinged mirrors? Different Vivenda Cases There should be about forty to fifty different vivenda cases for a classroom set of kaleidoscopes. The students can classify these cases in two ways. How do they look when on the kaleidoscopes and how do they look off? The vivenda cases can be changed to meet the needs of the lessons. It would be nice to have interesting cases. Should they be dry inside? If liquid is used what liquid? Alcohol, water, and cooking oil are liquids which do not mix well with each other and may be interesting liquids to use. The silicone used to put the cases together will always be soft and will not alter the surface of the glass or the frosted backing. So, the cases can easily be taken apart and rebuilt if they do not suit the class setting’s needs. Third, Fourth, and Fifth Grade Students Working with multiple grade level and many different classrooms is a delight. Sometimes activities can be deep enough to suit fifth graders and with a few simple changes in objectives, they can also work well in third grade classes. These activities are intended to be adaptable to grade level settings. Simpler and Cheaper Method A less expensive project for the classroom could include only using the mirrors for the kaleidoscopes. These would really be teleidoscopes. One would still need to purchase the reflective material and still cut the mirrors. Three mirrors could be taped together to form the kaleidoscopes or teleidoscopes. Yes, there would only be possible to make 60 degree angles, and it would not be possible to support four mirrors without a barrel. This illustrates how much stronger triangle structures are than squares.
Just using the mirrors alone will eliminate the barrels, the vivenda cases, and the objects to be viewed. This would be cheaper, and would also involve the students more in the making of the kaleidoscopes. Students could help by taping the mirrors together. By cutting the mirrors into 6 inch by 2 inch strips, one could make 128 three mirror kaleidoscopes with 60 degree angles. The cost would only be the $109 for reflective material. Virtual Kaleidoscopes It would be nice to make kaleidoscopes inside our computers and our cameras. It is not within the scope of this Unit, to build virtual kaleidoscopes and to develop the software. We can look at someone else’s virtual kaleidoscopes. Follow these steps to find some colorful examples. Jeff Weeks’ Work Jeff Weeks has built a couple of kaleidoscopes and put them on the internet for others to use. Go to http://www.geometrygames.org/. There are two activities that illustrate kaleidoscopes. Kali is a simple two dimensional activity which is lots of fun. The program’s default setting is on wall paper designs which are interesting. To study kaleidoscopes you may want to choose Rosette Groups. There are far too many options within this program to describe in this Unit, so go and visit it and see how virtual reflections can be beautiful. Another interesting activity listed is Kaleido Tile. This too is fun and it deals with three dimensional shapes and designs. There are lots of ways to use these programs in the classroom. Ideally, the classroom would be equipped with a Smart Board and the class could do the activity together. A computer lab would also be another good option. Geometry Games.org Another interesting virtual kaleidoscope site is sponsored by The Geometry Center. You can find it at http://www.geom.uiuc.edu/ . At this site, go to Downloadable Software. Once again you can sign up for Kali. Then click on Java version of Kali. On the next page, click Run the program. This version of Kali was developed in 1996 and is not as complicated as Weeks’ program. These are just examples of kaleidoscopes on the web, surely there are more. Reflections This Unit may have been more helpful if more energy was spent on developing the lessons and not as much on the product. We all seem to like kaleidoscopes anyway. There are many different level of understanding how they work. In the elementary school setting, there is a great emphasis on differentiation instruction. During the development of this Unit, we had dinner guests. Both friends are accomplished professionals. One is a pharmacist, who is an amateur mathematician. We enjoy talking about math. His wife was a computer programmer twenty years ago and now is the head manager of information and computers at her company. After showing him some of the reflections equations from Roe Goodman’s article Alice through Looking Glass after Looking
Glass: The Mathematics of Mirrors and Kaleidoscopes, my friend said he could not understand them. Neither could my engineer son. I am still just starting to understand the math. We were looking at the first kaleidoscope built, a 3 mirror open ended tube with mirrors at 60 degrees. She wanted to know what mirror was at the end of the kaleidoscope. Of course there was no mirror at the end. There are only mirrors on the sides. It seems we all have a good deal to learn about kaleidoscopes. We would like to explain how things work mathematically in detail. Maybe we should be happy to get others attention through beauty. They may learn some math at a level that is comfortable for them.
Annotated Bibliography Barker,William. Continuous Symmetry From Euclid to Klien. Providence, RI: American Mathematical Society, 2007. This has a section on the theory of kaleidoscopes and kaleidoscope construction. Farmer,David. Groups and Symmetry A Guide to Discovering Mathematics. Providence, RI: American Mathematical Society, 1996. While this book does not discuss kaleidoscopes it is a valuable resource for understanding symmetry. Kalajdzievski,Sasho. Math and Art An Introduction to Visual Mathematics. Boca Raton, FL: Taylor & Francis Group, 2008. This is a comprehensive resource for understanding the beauty of different mathematical subjects, to include symmetry. Kinsey ,L.Christine. Symmetry, Shape and Space. Dania, FL: Key College, 2006. This book provides information on symmetry and many other mathematical topics, such as constructions, tessellations, polyhedral, three-dimensional symmetry, spiral growth, shape, graph theory, and topology.